Order yours today for fast shipping at. Retrosound owners manuals archives.
Power Antenna Schematic Banyulangit 10 Brillenstudio
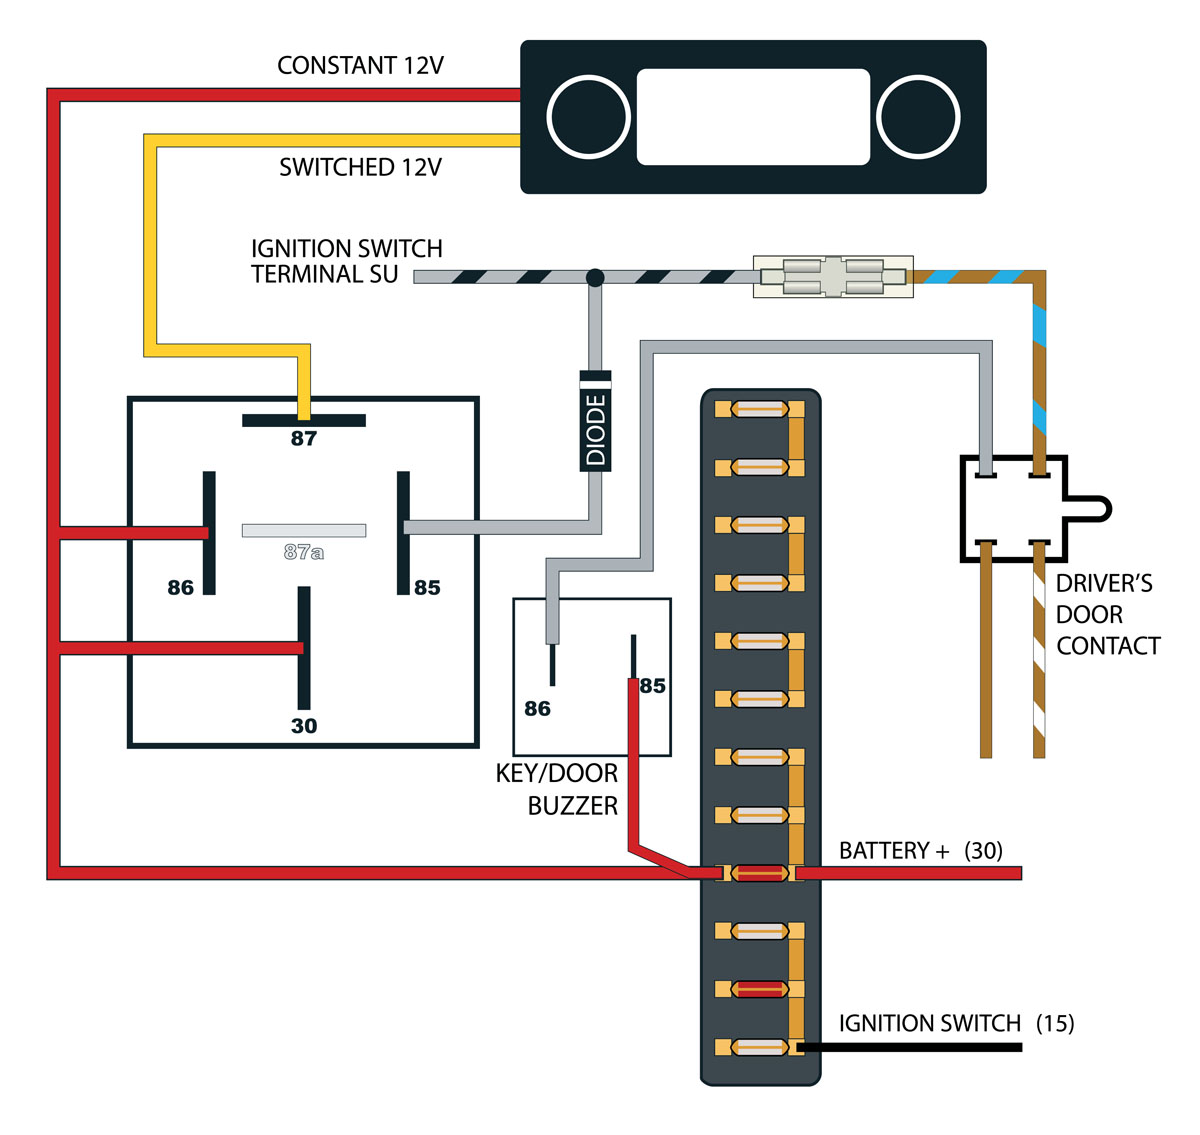
Retrosound wiring diagram. Complete wiring connections except motor 2 7 except motor 2 7 figure 5 wiring diagram note. You can save this image file to your individual laptop. Wiring harness and speaker wiring harness see whats in the box on page 4. The wiring diagram is in the aim upc 12 sheet d3 yellow power and black ground both 20 gauge wires and upc u63u69 sheet a3 items 4 and 5. First connect the main wiring harness to the back of the radio. How to locate both switched and constant 12 volt wires for use with the retrosound model 2 radio.
This is the autorestomod review of retrosound model two classic car radio of a graphic i get via the auto radio knobs replacement collection. Then connect both the power and speaker wiring harnesses to the black female plug of the main wiring harness. If so this is a good place to start. Retrosound is a leader in the design and engineering of innovative radios speakers and antennas for the classic automobile marketblending classic styling and compatibility with modern sound features and conveniences. We also have some more photos linked to auto radio knobs replacement please see the picture gallery below click one of the pictures then the. Please note that you will need to connect the constant 12v.
Cutting the wiring harness antenna lead or auxiliary cable will void your warranty. Please right click on the image and save the graphic. If you still have the original radio installed just look on the back and youll see the connections. 12 volts constant is the factory radio still in the car. We show how to use the speaker grilles as a baffle on the stock speaker enclosures or weather pot. Main wire harness power wire after doing this connect the bare wire ends of your power and your vehicle see figure 4 wiring diagram.
Wiring diagram installation instructions step 4. Summit racing carries retrosound stereos and antennas for your classic car or truck. Wiring diagram for direct connection power front rear level quad 4 level hi hi full full max min max min x over this diagram shows you how the quad 4 amplifier is connected directly to your retrosound radio using the standard plugs included. Basic wiring what a radio needs to work correctly. Retro manufacturing llc 7470 commercial way henderson nv 89011 toll free. Yellow wire 12 volts constant red wire 12 volts ignitionaccessory black wire ground if you do not connect all of these wires the radio will not work.
Locate the three wire harnesses. After doing this connect the bare wire ends of your power and.
Gallery of Retrosound Wiring Diagram